
Chapter 5: Document Design
5.4 Tables
This section explains how to create tables to display information in a more digestible format.
Learning Objectives
After you read this section, you will be able to:
- Determine when you need to include a table in your document
- Create and change a table in Word and Google Docs
What are tables?
Tables are visual ways to organize content and data allowing users to scan information quickly. Most students think that they can only organize information in paragraph form, but this makes reading difficult and slow.
Tables are used to display information and data in vertical columns and horizontal rows labeled at the top of each column and left side of each row to allow users to quickly scan and digest information. The intersection of a column and row is called a cell.
Effective tables include “thin lines and generous white space to separate the columns and thin horizontal lines to separate …categories of information” as well as bold and centered headings (Tebeaux & Dragga, 2018, p. 106), a scannable length of rows, footnotes for extra information, source indications (Markel, 2016), left aligned text, and sometimes shading of alternate rows rather than inclusion of lines (Redish, 2012).
To create a table in Word
- Determine what information you need to display in a table and how many columns and rows you will need
- Click Insert on the toolbar
- Click Table
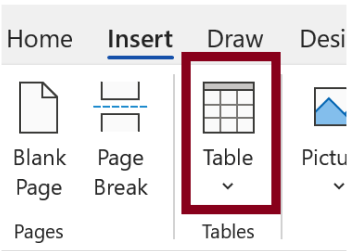
Figure 5.4.1 Table Tool - Drag your cursor over the number of rows and columns you need, and the table will populate immediately in your document
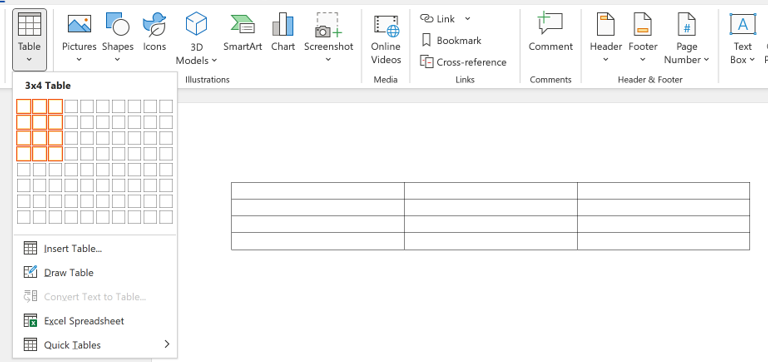
Figure 5.4.2 Rows and Columns - Type labels at the top of each column and left of each row

Figure 5.4.3 Example Table
To add/delete a column/row to a table in Word
- Put your cursor in the cell where you want to add or delete a column or row
- Right click your cursor to open options
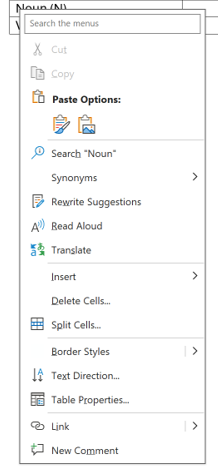
Figure 5.4.4 Table Options - To insert a column or row, click Insert which opens options
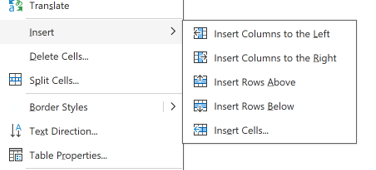
Figure 5.4.5 Insert Columns or Rows - Choose the option you need
- To delete a column or row, click Delete Cells to open new options
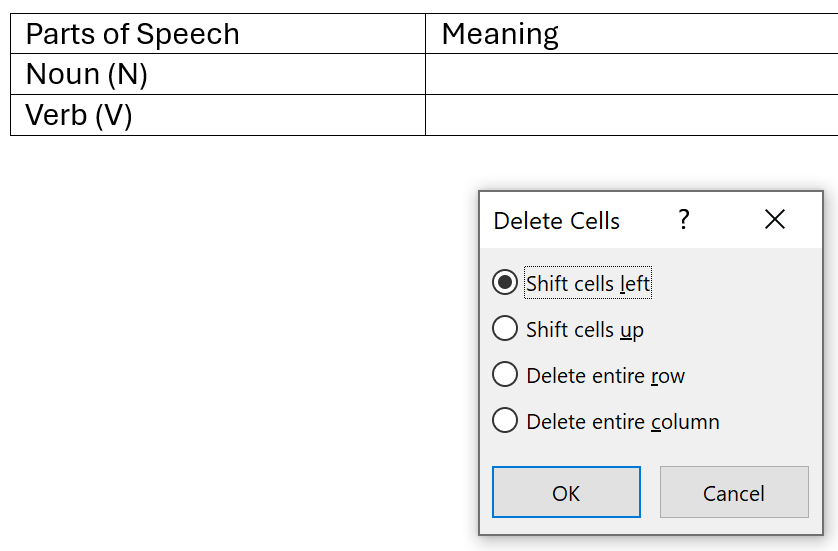
Figure 5.4.6 Delete Options - Chose the option you need
To change properties of a table in Word
- Highlight the cells you want to shade with your cursor

Figure 5.4.7 Highlighted Cells - Right click to open options
- Click Properties toward the bottom of the options
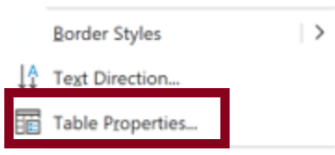
Figure 5.4.8 Table Properties - More options open including wrapping text, changing alignment, and cell width. To change shades and colors, Borders and Shading at the bottom
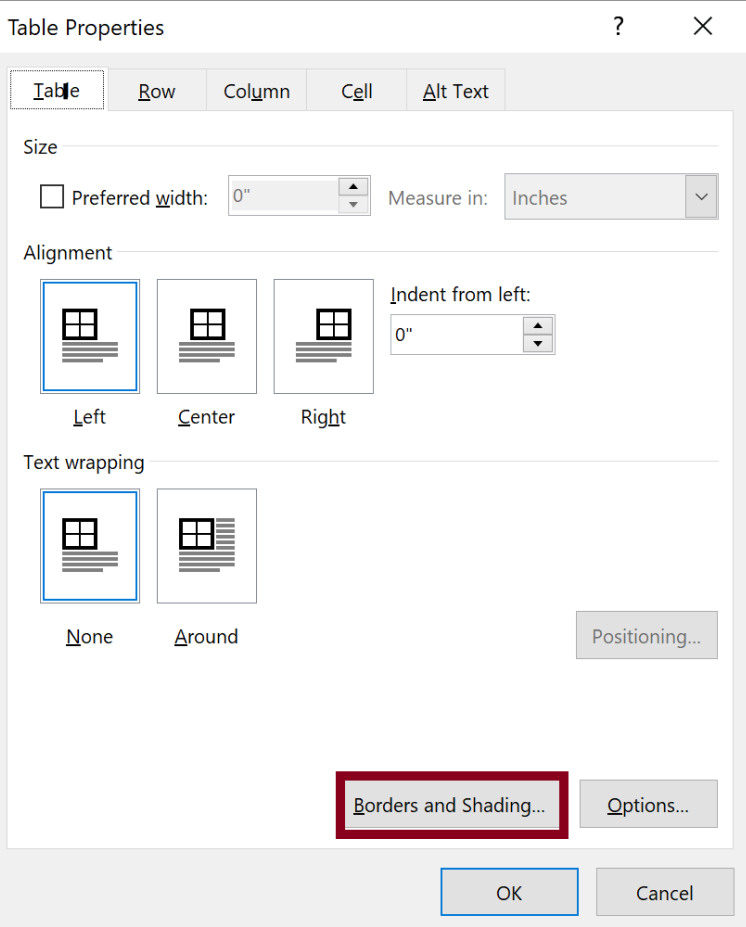
Figure 5.4.9 Borders and Shading - When new window opens, change Fill color
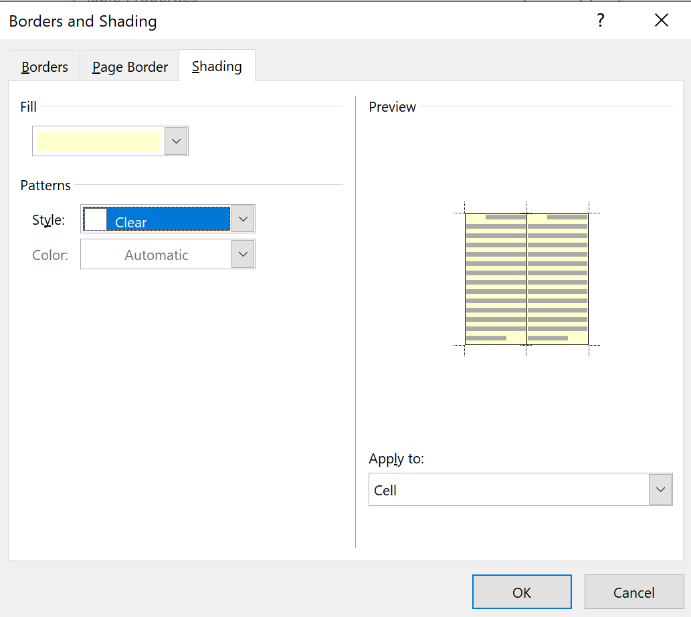
Figure 5.4.10 Change Fill Color - Click OK
- Click OK
- The highlighted cells will turn the chosen color.

Figure 5.4.11 Example Table with Light Yellow Headings
To create a table in Google Docs
- Determine what information you need to display in a table and how many columns and rows you will need
- Click Insert on the toolbar
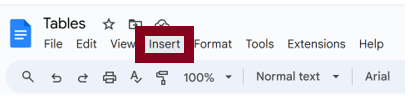
Figure 5.4.12 Insert Tool - Click Tables when the drop-down menu opens
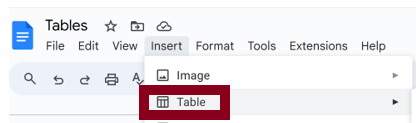
Figure 5.4.13 Table Tool - Drag the cursor across the cells to choose how many columns and rows your table needs. This table will include 4 columns and 3 rows
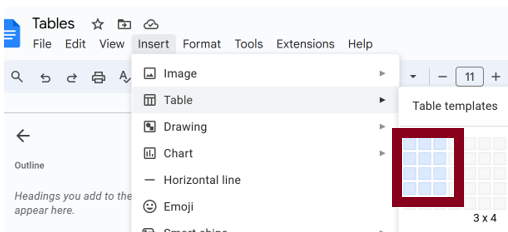
Figure 5.4.14 Rows and Columns The table will display like this:
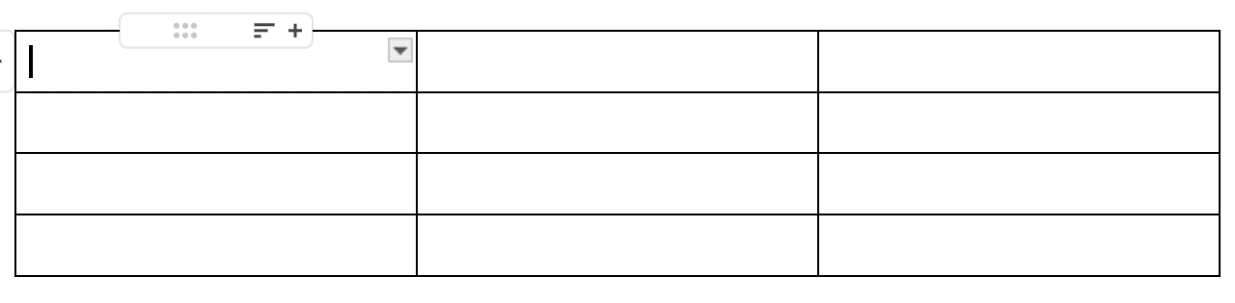
Figure 5.4.15 Blank Table - Type labels in the first row and column. For example, this is the top of the sentence table in the Writing Style chapter:
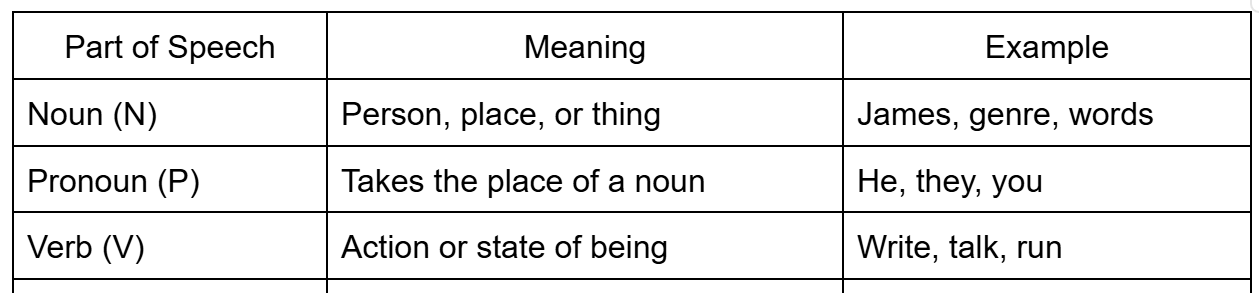
Figure 5.4.16 Example Table
To add/delete columns or rows to your table in Google Docs
- Put your cursor in the specific cell where you want to add columns or rows
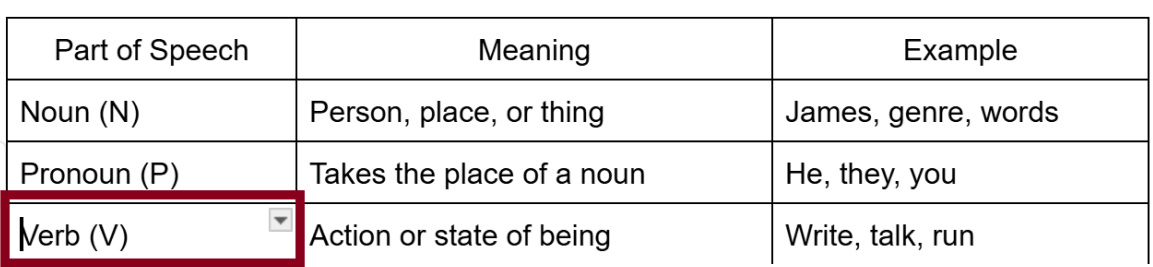
5.4.17 Completed Example Table - Right click the cursor to open options
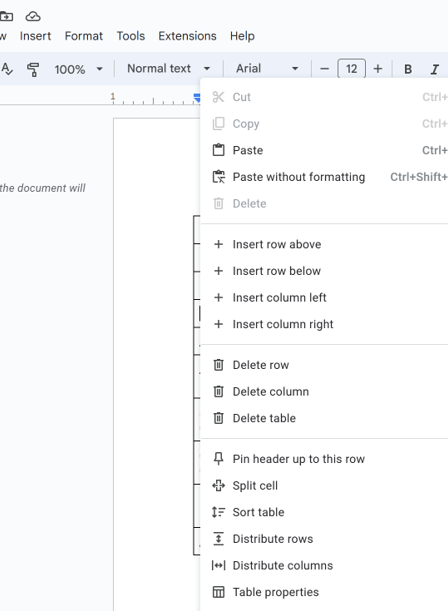
Figure 5.4.18 Table Options - Scroll down and click the option you want, including adding columns or rows above or below the current cell. If you click Insert row above, a blank row with the same number of columns will be inserted
- Repeat this process to insert rows below, insert columns to the left or right, or delete rows or columns
To change the properties of a table in Google Docs
- Properties include the size, color, and alignment of cells
- Put your cursor in the cell of the row or column you want to change
- Right click and scroll down to the bottom of the options as you did to insert/delete rows and columns
- Click Table Properties
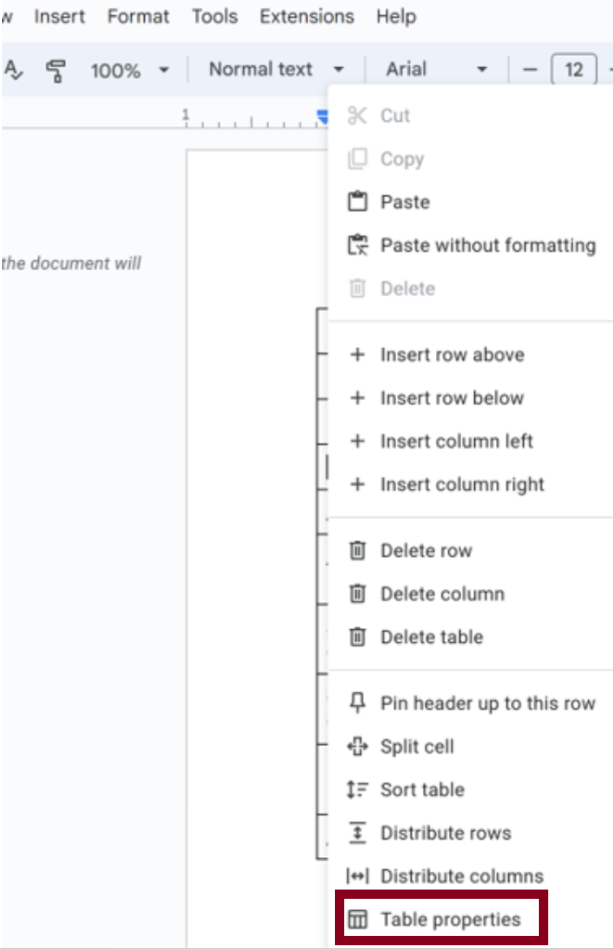
Figure 5.4.19 Table Properties tool - When the new window option opens to the right of your screen, choose the property you want to change by clicking the carrot to the left of the property
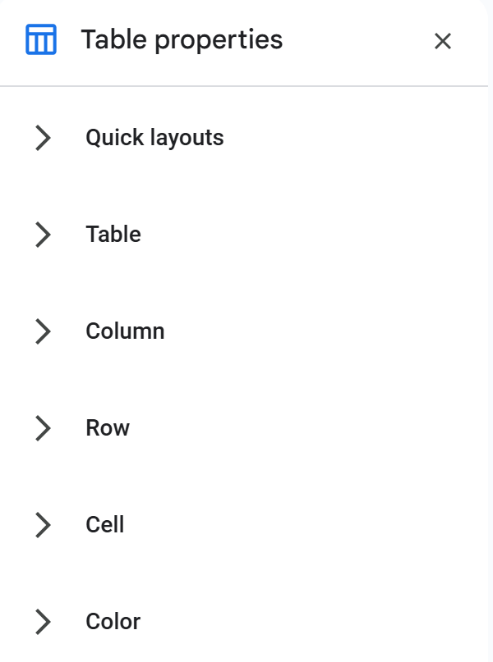
Figure 5.4.20 Table Choices - To change the color of the heading, click Color, which opens more options. The current cell has a table border of 1 pt black line with a white background
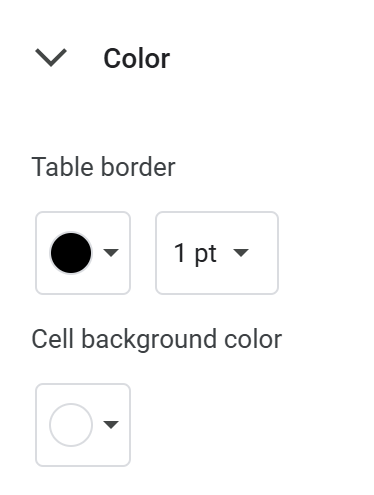
Figure 5.4.21 Table Color - Highlight the cells that you want to change
Figure 5.4.22 Change Table Color - To change the background color, click the background color option, which opens color choices
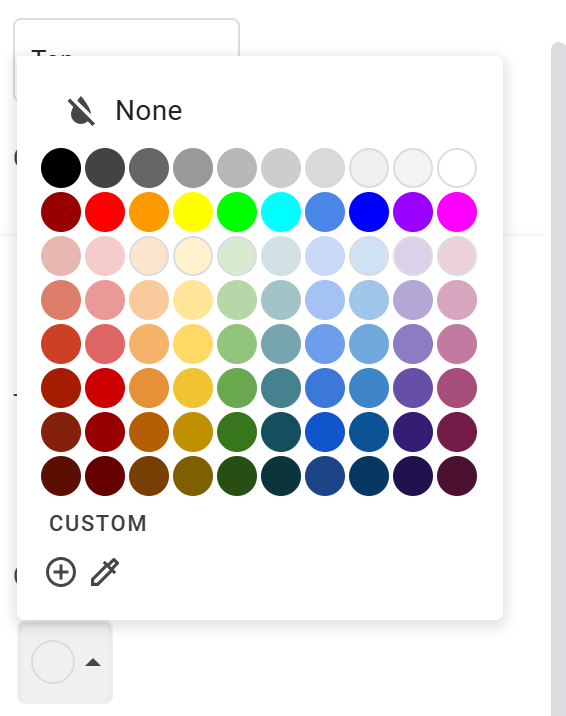
Figure 5.4.23 Color Options - Click a color (light yellow)
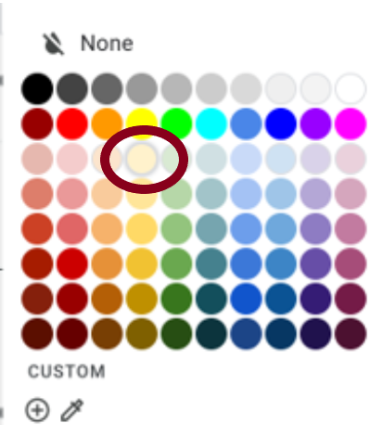
Figure 5.4.24 Light Yellow - The cells will automatically change background color to light yellow:

Figure 5.4.25 Table with Light Yellow Headings
