
Chapter 5: Document Design
5.1 Headings
This section explains the importance of headings and shows you how to format them in Word and Google doc.
Learning Objectives
After you read this section, you will be able to
- define headings
- identify first, second, third, and fourth level headings
- format Word Styles in Word
- apply Word Styles on headings in Word
- format and apply headings in Google Docs
How do you format headings using technology?
Technical documents also include headings which are not used in typical essays. Headings allow users know what information will be included in a section and are always required in technical documents.
Your content should be divided logically into sections and subsections indicated by clearly worded, parallel headings. For example, this sub section is located in the Design and Formatting chapter which is the main heading and is further divided into a subsection called Headings. Only information about headings will be presented in this subsection.
When you further break down content, such as To Format Word Styles (below), you use lower-level headings with different contrast.
The main heading of a section is a level one <H1> (Design and Formatting, for example). Main <H1> sections can further be divided into subsections: level 2 <H2> (Headings, for example), level 3 <H3> (To Format Word Style, for example), level 4 <H4>, and sometimes, but rarely, level 5 <H5>.
Headings need variation in contrast through font style, size, weight and even “space signaling”, so the audience understands the hierarchy of ideas (Kramer & Bernhardt, 2004). For each level of heading, the contrast needs to be the same, but the levels must be different.
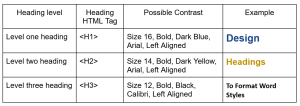
The contrast that you choose for EACH heading level must be used throughout the document consistently. Additionally, if you are writing for a specific company, make sure you review their style guide and use the appropriate font size and colors to maintain branding.
Level one headings are more effective if you start place them at the top of a new page regardless of the amount of white space on the previous page, and don’t let headings stand alone at the bottom of pages. These are called orphaned headings. Make sure you move the to the top of the next page instead.
To format Word Styles
If you use Word, using Word Styles allows you to format your title and each level heading before you format your document. When you’re ready to format your title and headings, you can highlight and click quickly.
- Open your document in Word, and you will automatically be on the Home toolbar
- Click the down button to the right of the Styles options in the middle of the Home toolbar to open the Word Styles headings
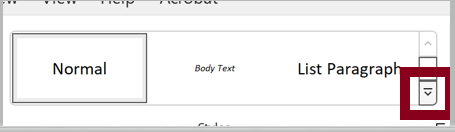
Figure 5.1.2 Down button - When the headings window opens, right click Heading 1
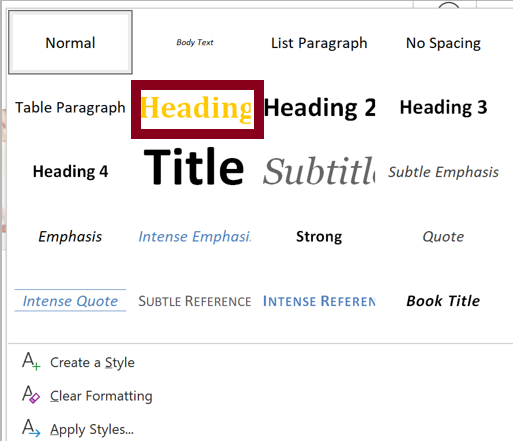
Figure 5.1.3 Heading 1 - Click Modify when the new window opens
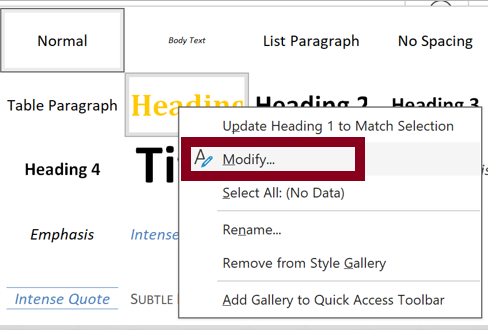
Figure 5.1.4 Modify - When the new window opens, choose the font style, font size, contrast, and color you want for each heading level 1 in your document
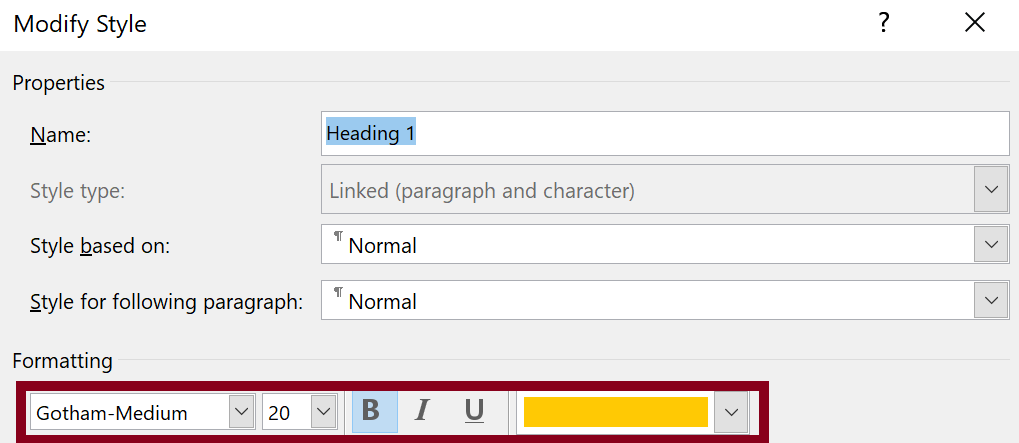
Figure 5.1.5 Font style, size, contrast, and color - Click OK at the bottom of the Modify window
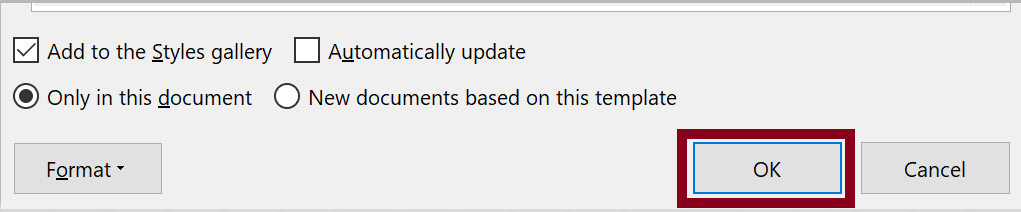
Figure 5.1.6 Ok modification - Repeat this process for each heading level, but make sure that the contrast choices are different for each level
To apply Word Styles on headings
- Click and drag your cursor over the heading that you want to format

Figure 5.1.7 Introduction - Click the formatted heading on the Word Styles ribbon you want
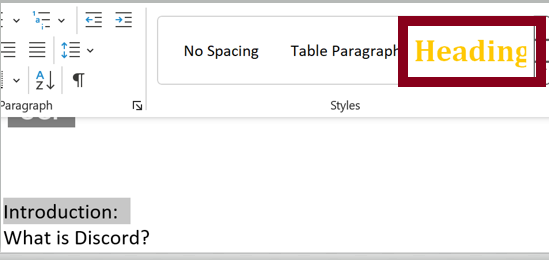
Figure 5.1.8 Level One Heading - The formatting will apply automatically. Repeat the process for each level heading

Figure 5.1.9 Introduction formatted
To format Google Doc headings
If you use Google Docs, the platform has a similar formatting tool to Word Styles.
- Open your Google Doc
- Change the font size, font style, color, contrast, and alignment of a level one heading in your document: This is size 20, Cambria, bold, black, and left side justified

Figure 5.1.10 New format - Keep your cursor at the heading you just changed
- Click the down carrot next to Normal text

Figure 5.1.11 Normal text option - When the heading options open, click Heading 1

Figure 5.1.12 Heading 1 - Click Update ‘Heading 1’ to match
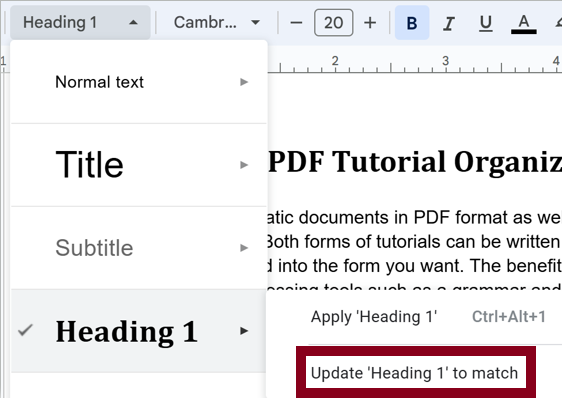
Figure 5.1.13 Update heading - Repeat the process for all headings
| Note: Google Docs automatically changes the heading contrast for all headings that were originally formatted using this tool. If you did not already try to format some headings, follow the directions below. |
To apply formatting in Google Docs
- Click and drag your cursor across each heading you want formatted
- Click the down carrot next to Normal text

Figure 5.1.14 Normal text option - When the heading options open, click Heading 1

Figure 5.1.15 Heading 1 - Click Apply ‘Heading 1’
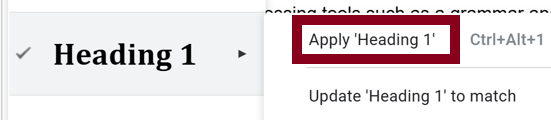
Figure 5.1.16 Apply Heading - Repeat this process for all headings
| Note: As discussed in the table of contents section of this tutorial, you need to apply the proper formatting to all headings in order for Word and Google Docs to create a correct table of contents. |
Media Attributions
- headings
