
Chapter 5: Document Design
5.2 Images
This section will show you how to create shapes and lines in Google Slides, use the Snip tool, take screenshots to include images in your tutorial, and design in 3-D Paint.
Learning Objectives
After you read this section, you will be able to
- create blank slides, shapes, and lines in Google Slides
- use the Insert tool in Google Slides
- create screenshots
- create Snips
How can you create your own images?
Images and figures are not optional in tutorials since you need to show your audience what to do immediately after you tell them what to do. Many students think that they should just search Google for images that are already created; however, as a technical writer, you need to create them yourself and not rely on someone else’s work. Additionally, not all images that you find online are in the public domain, meaning you would need to cite them correctly and get permission from the original creator if your employer wants to publish the material you create; however, this tutorial does not discuss citing sources.
Figures with Shapes
You may be tasked with creating figures out of shapes, such as a Map as discussed in the Prewriting section of this tutorial, and you can use Microsoft PowerPoint or Google Slides to do so. Since Google Slides is free and accessible regardless of operating system, the following instructions are using Google Slides.
Once you create a blank slide, there are two ways to insert shapes using the Insert tool on the toolbar or using the Shape icon on the ribbon just below the toolbar.
To create a blank slide first
-
- Log into Google Slides using your gmail address
- Click the + button in the lower right-hand corner, and a blank presentation will open, but it will be populated with title and subtitle text sections

Figure 5.2.1 New slide - To change the default slide to a blank presentation, click Slide to open an option window
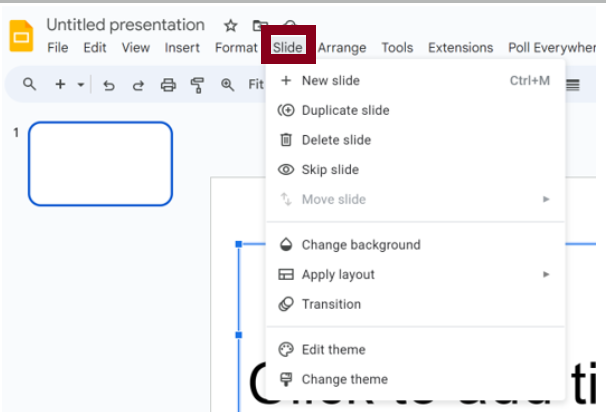
Figure 5.2.2 Slide tool - Hover over Apply layout
- Click Blank
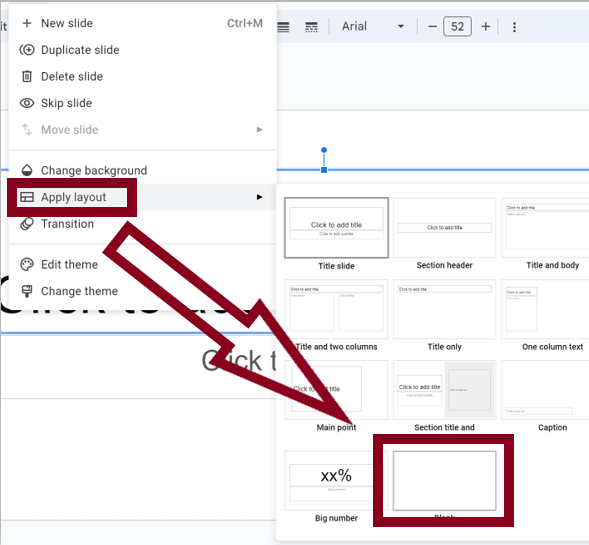
Figure 5.2.3 To change to a blank layout
To use the Insert tool:
-
- Click Insert when the blank slide displays
- Hover over Shape
- Hover over Shapes in the new dialog box
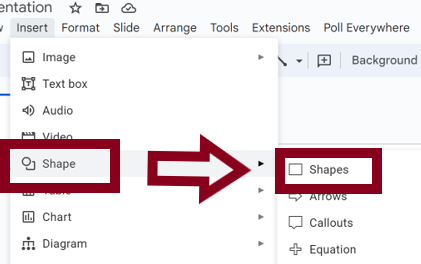
Figure 5.2.4 Shape tool - Click the circle
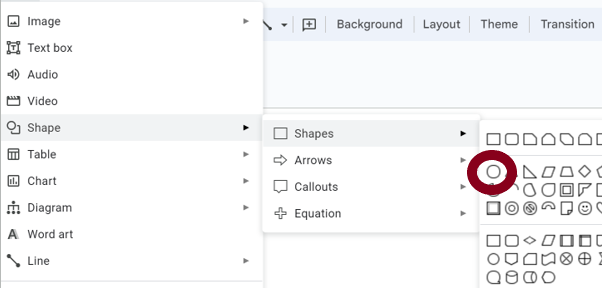
Figure 5.2.5 Circle shape - Click into the blank presentation with the + and a circle will appear
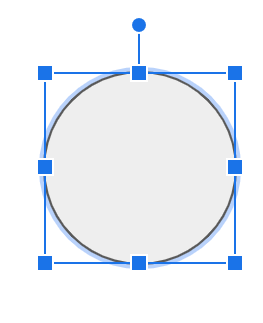
Figure 5.2.6 Circle shape on slide - Click one of the 8 points and drag it either outward to enlarge the circle or inward to decrease the size
The shape will be added to the slide.
To use the Shape icon on the ribbon:
-
- Click the Circle/Square icon which opens options
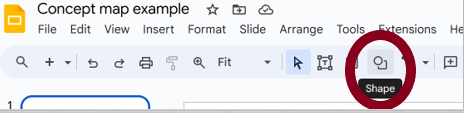
Figure 5.2.7 Shape tool - Click Shapes in the new option window
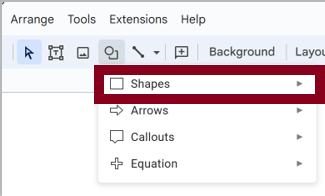
Figure 5.2.8 Shape dropdown - Click the Circle in the next new option window
- Click the Circle/Square icon which opens options
To add text to your shape:
-
- Right click in the circle to open new options
- Click Edit Text to include text in the circle

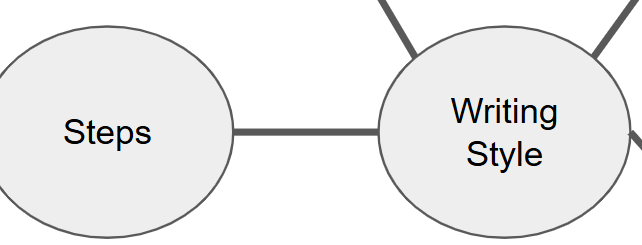
Figure 5.2.9 Edit text option - Type the topic idea in the circle
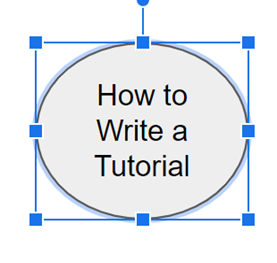
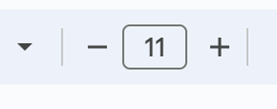
Figure 5.2.10 Write text - If the text is too large, either increase the size of the circle as stated in Step 6 above or decrease the size of the font using the – + font size on the toolbar
To create Lines
-
- While in the slide, click the line tool on the ribbon
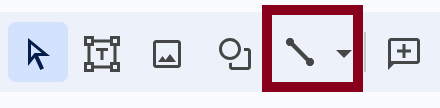
Figure 5.2.12 Line tool - Click in the slide where you want the line
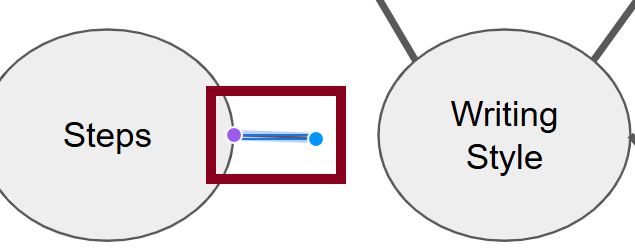
Figure 5.2.13 Start line - Drag the line to where you want it to end
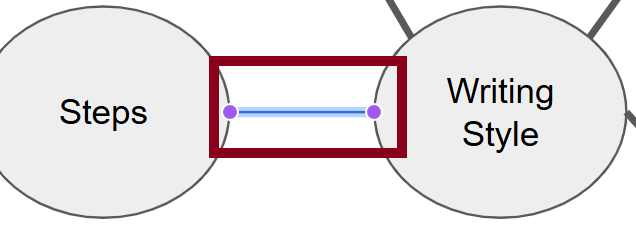
Figure 5.2.14 End line - To increase the thickness, click the Line Weight tool on the ribbon

Figure 5.2.15 Line weight tool - When the font size options open, click on the size you want (3 px here)
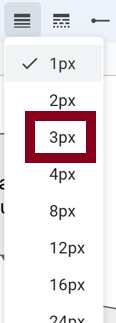
Figure 5.2.16 change point The line thickness changes immediately.
- While in the slide, click the line tool on the ribbon
Figures with Screenshots
If you are using a Microsoft operating system, your keyboard probably has a screenshot key which will copy your entire interface as an image. This includes all tabs you have open as well as content at the bottom of your screen such as the date, time, and even your search window, as shown below:
There are several different keyboard shortcuts you can use depending on your hardware, so they won’t be included here, but you need to understand that you shouldn’t use full screenshots in your documents, regardless of genre, since your audience will never need to see all of the information open on your interface. Remember, technical communication means that you provide ONLY need-to-know information to your audience.
You can, however, use part of a screenshot when the snip tool can’t be used. This tool will be discussed in the next subsection. For example, it is impossible to use the snip tool when you are also trying to use your cursor for something else, so taking a screenshot saves the image, and then you can snip what is necessary for your document.
Figures with Snips
All Windows operating systems include a snip tool, which can be used to cut out parts of your interface, which is especially helpful when you are explaining how to use software in a tutorial.
To use the snip tool
-
- Write Snip in the search window at the bottom of your screen

Figure 5.2.19 Search for Snip - When the new options open above the search window, click Snipping Tool at the top
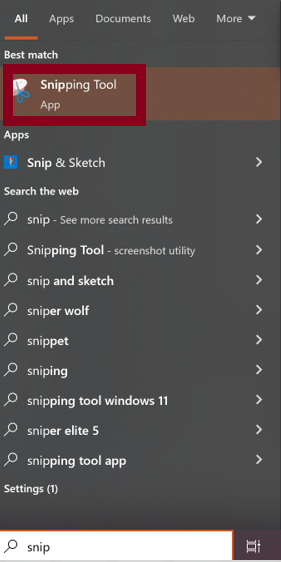
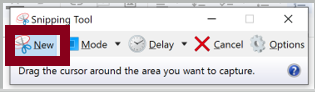
Figure 5.2.20 Snipping tool - When the snip tool opens, your screen will be somewhat grayed out. Click New on the Snip toolbar
Figures 5.2.21 New - A + will appear on your screen. Click the + and drag it around the section of your screen that you want copied, and the image will be captured
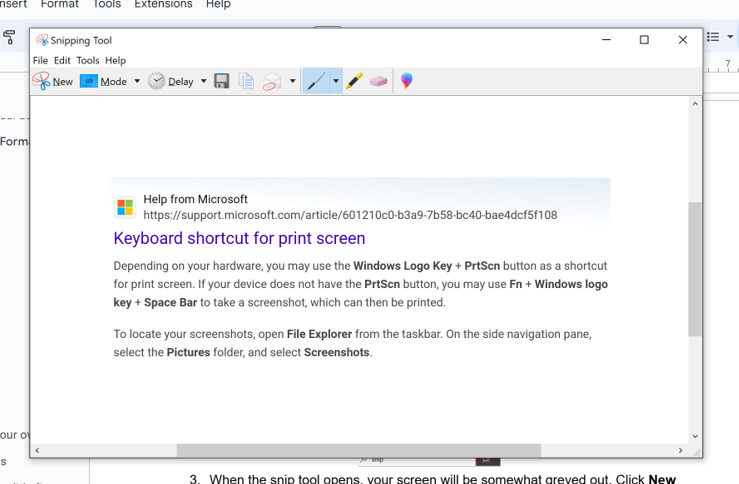
Figure5.2.21 Drag section - If you are happy with the snip, paste it into your document by clicking Ctrl + V
- If you want to save the image, click File and Save As
- Write Snip in the search window at the bottom of your screen
The default is automatically a rectangular shape; however, you can change the mode.
To change the snip shape mode
-
- Open the snip tool
- Click Mode
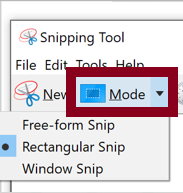
Figure 5.2.22 Mode option - Click a new mode: The Free-Form snip allows you to cut around an image while the window snip is a screenshot of your whole screen
- To save the image, click File and Save As
To use 3D paint to add shapes to your snip
-
- When you have snipped an image, click the rainbow paint icon on the top toolbar to open a word area
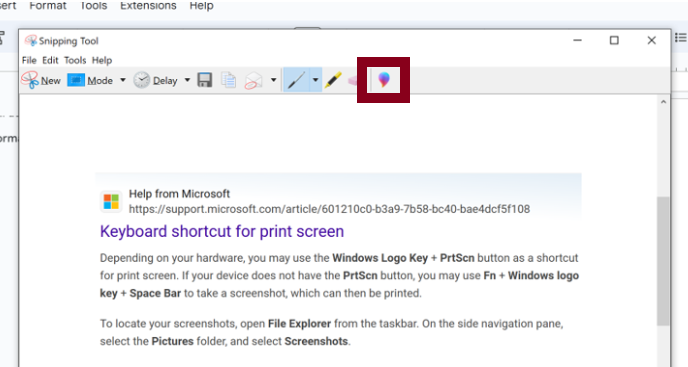
Figure 5.2.23 3-D Paint tool - Click 2D paint at the top of the new toolbar

Figure 5.2.24 2-D Paint tool - Click the shape you want to include on the image from the right side options

Figure 5.2.25 Square - Drag the shape to expand or shrink when you want it
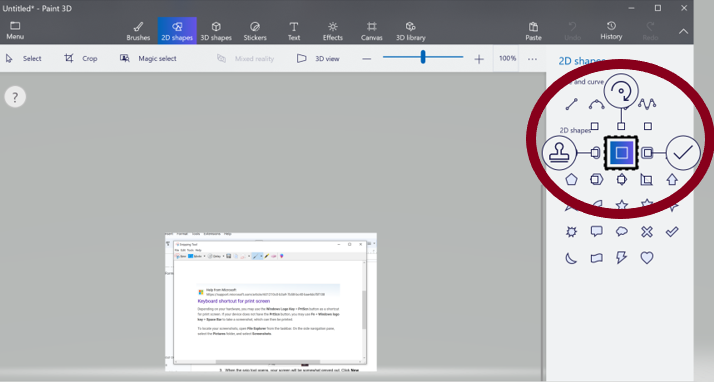
Figure 5.2.26 Choose square - Click the color you want for your shape
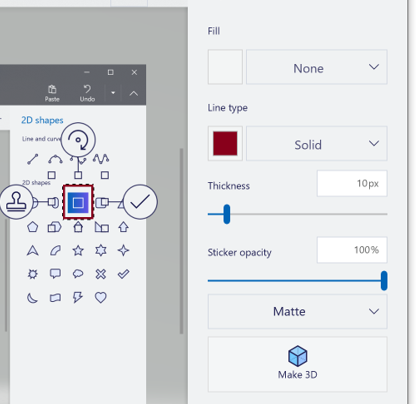
Figure 5.2.27 Color, thickness, opacity - Click the Check Mark to change the color
- When the image includes the correct shape and color, reopen the Snip tool
- Click New on the Snip tool
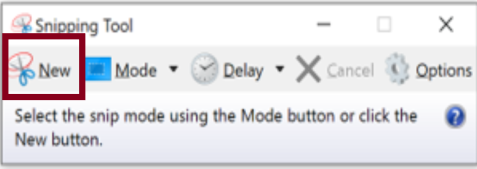
Figure 5.2.28 New option - A + will appear on your screen. Click the + and drag it around the section of your screen that you want copied, and the image will be captured
- If you are happy with the snip, paste it into your document by clicking Ctrl + V
- If you want to save the image, click File and Save As
- When you have snipped an image, click the rainbow paint icon on the top toolbar to open a word area
